
DOWNLOAD THE APP


Customer Services
Copyright © 2025 Desertcart Holdings Limited
DOWNLOAD THE APP


✨ Peel, stick, and elevate your floors—style that sticks with you! 🏡
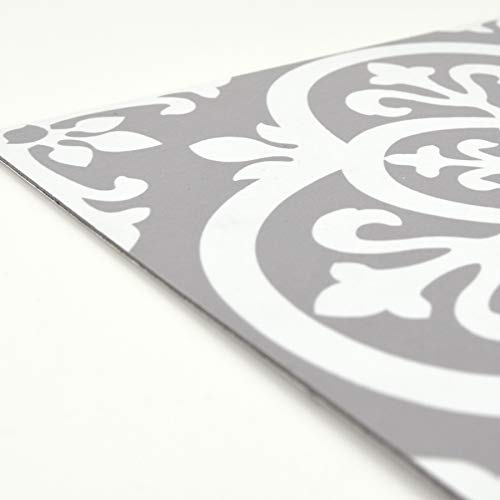
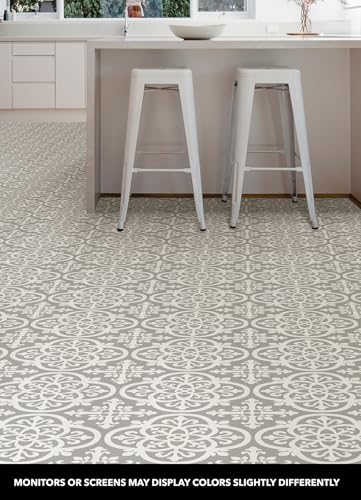
FloorPops FP2942 Medina Peel and Stick Floor Tiles offer a stylish, easy-to-install flooring solution with a chic farmhouse and gothic-inspired design. Made from durable virgin vinyl with a waterproof, washable surface and permanent adhesive, these gray tiles come in packs of 10, each measuring 60" x 24" x 0.6". Ideal for quick DIY upgrades without grout or special tools.


| ASIN | B07QFBX8R1 |
| Amazon Bestseller | #850,709 in DIY, Tools & Garden ( See Top 100 in DIY, Tools & Garden ) #1,480 in Vinyl Flooring |
| Brand | FloorPops |
| Color | gray |
| Customer Reviews | 4.2 4.2 out of 5 stars (6,966) |
| Date First Available | May 3, 2019 |
| Included Components | Floor Tiles |
| Item Weight | 2.49 Kilograms |
| Laser Class | Easy to install, Waterproof |
| Model Number | FP2942 |
| Name List for Name Plates | floor tiles |
| Paint Object | Medina |
| Product Dimensions | 152.4 x 60.96 x 0.15 cm; 2.49 kg |
| Quantity | 10 |
| Wallpaper Pattern | Checkered |
S**A
Purtroppo non le potrò utilizzare sul pavimento della mia stanza perchè troppo complicato essendo un pavimento vecchio ma sono talmente belle che ho deciso di tenerle invece di rimandarle indietro
J**J
I decided to cover the existing blah contractor grade linoleum in our laundry room. As with a lot of DIY projects a lot of time involved is the prep - the cleaning, the moving of the items in the room, etc. After I had the room emptied and the floor & baseboards cleaned I decided how I would lay out my new tile design. Directions suggest finding the true center of the room and working out from that point. I decided to go with the visual center of the room as it pertained to my most frequently seen view into the laundry room. I also wanted the tiles to be centered as they were placed in between the washer and dryer. The walls in the laundry room and their corresponding corners are not true square so the existing linoleum with a square pattern (which was not installed on the diagonal) always looked crooked. That was why the third design decision I made was to lay the new tiles on the diagonal. That decision definitely caused the project to take a lot more time as far as all of the varying cuts required along the walls. Once I began the project I realized that at least 50% of the new tiles were dirty. They had a black dust and/or spots that needed to be cleaned. I was very disappointed in that. The next thing I realized was that about half of the tiles were cut incorrectly when they were manufactured. This particular tile design requires its edges to be exactly on center otherwise when you take the next tile that is on center there’s no way to line them up. I wish I would have ordered extra cases of the tiles so that I could have cherry picked the centered and the clean tiles to save myself a lot of headache. I found that using my dollar store breakaway blade box cutter was a very easy way to score the tiles. Then I would bend them and they would break along the scored line very cleanly in most cases. Are used my needle nose pliers a lot for the cuts that were difficult to get a cleanly cut edge. Overall I absolutely love the way it turned out it so does my husband. For the price I don’t think you can beat it the style upgrade, but it was by no means a 30 minute project. LOL it took me DAYS of working a few hours at a time. If I had it to do all over again I would probably spend the $20 on a linoleum tile cutter, the kind that look like a paper cutter with a sliding blade. I think that would have been a big timesaver for me. Oh and you will definitely need some kind of adhesive; the self stick isn’t nearly strong enough. These tiles are a very cool product. I tried a different adhesive tile design to line the bottom of my kitchen cabinets that hold the heavy duty appliances and I loved the result. Have fun with it good luck!
K**N
Love this product
S**A
When I painted my entrance hall, the first thing that struck me was how dingy the old linoleum floor looked. It was probably from the 90s and the sun had faded it to a dull brownish colour. I've been waiting and saving money to tile the entrance, but after 4 years, I couldn't come up with enough money. And I couldn't decide what I wanted to do. I saw a friend post a picture of how she put this stuff in her bathroom and I was shocked. I thought Peel & Stick looked cheap and lazy. But this was amazing! I immediately ordered enough boxes and laid it myself... right over the old dingy linoleum!!! It makes my entrance pop and it looks new and good! Even with a slight colour variation between the tiles and the pattern not lining up 100% it looks so good! I am so happy with it! It took me about 6 hours--most of that was lining up the tiles properly. It was easy to instal, and easy to cut! The instructions said to use an exacto-knife, however I found that a good sharp pair of scissors and a pencil line worked like a charm! I laid 10 boxes of this flooring. And only two tiles out of all of them are popping up in the corner. I got some vinyl tape at Home Depot and stuck a tiny piece under the corner of each tile and they are stuck down for good now! I get lots of compliments on this floor!!!
M**A
Me ha gustado el diseño. NO LO RECOMIENDO, ME GUSTARÍA SER COMPENSADO POR LA INEFICACIA DEL PRODUCTO.
Trustpilot
3 days ago
1 month ago