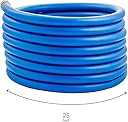
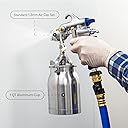


🎨 Elevate your craft with power and precision — spray like a pro, every time!
The Fuji Spray 2202 Semi-PRO 2 HVLP Spray System is a top-tier, professional-grade paint sprayer featuring a powerful 1400 watt 2-stage motor housed in a durable metal turbine case. It offers precise spray pattern control with an adjustable fan knob and includes a 1-quart bottom feed cup and a 25ft hose with an air control valve to reduce overspray. Designed for serious DIYers and professionals alike, this system delivers superior finish quality and versatility for a wide range of coatings.


| Best Sellers Rank | #141,574 in Tools & Home Improvement ( See Top 100 in Tools & Home Improvement ) #407 in Power Paint & HVLP Sprayers |
| Brand | Fuji Spray |
| Color | Blue |
| Customer Reviews | 4.8 out of 5 stars 1,601 Reviews |
| Item Weight | 25 Pounds |
| Material | Metal |
| Recommended Uses For Product | Painting |
| Tank Volume | 1 Quarts |
S**P
Great results, easy to use (even for a beginner)
This is a great sprayer, even for an amateur like me. It is easy to set up, relatively easy to clean up, and controlling the spray pattern was easy as well. The build quality is really solid which also translates to a bit of weight - but the hose is plenty long so you don't need to move the base around while spraying. It took a little bit of trial and error to get the paint to the right consistency (adding water to latex paint), but I was able to get there - just remember to not start with too much additional water - you can always add more. Definitely recommend wearing ear plugs or some other form of protection because the fan does get loud but that is to be expected. Also would wear protection for your breathing because the paint is truly a fine mist. I got the bottom feed but I will likely also get the gravity feed mechanism in the future as I think it might be a little more comfortable to hold / manipulate the gun for some spraying positions. I also recommend getting the whip hose as it makes it easier (and feels lighter) than pull the heavier hose as you spray.
M**N
A quality machine with some market flaws
Prior to purchasing the Fugi Sprayer Semi-Pro, I read every review and watch a lot of YouTube presentations on it. For the money, I felt this would be the best choice. I've used this sprayer on a couple of projects now and have come to appretiate some things about it and question a few things. Pros: 1. Surprisingly quiet considering it's a small turbine. 2. The hose is very manageable without having to buy the small pigtail that some have. 3. Its fairly simple to clean, though I use water based prodocts 4. The instruction manual is good and to the point. 5. Fairly light weight compared to the old sprayer I had. 6. The quality is unmistakably great. Everything about it is top notch. 7. It performed flawlessly and both my customer and I loved the finish it gave. Cons: (These go to marketing not the ability of the machine) 1. Parts are not available near me, order on line is about the only option. 2. A 1.3 mm spray tip came with the gun. That's great for spraying thin material but normal stuff like polyurathane, lacquer and such you need at least a 1.5 mm tip. They should include this. At about $45 dollars a pop that would have been nice. If I ever wanna spray water though I have the tip for it. 3. The filter at the bottom of the pickup tube broke after 2 uses. I order a new one (5 in a package $10) but had to wait to finish a project due to it. They include a package of "wearable parts" why the don't include the filter beats me. Overall I'd buy it again just because of the quality. Quality in the way it's built, quality in the parts ( when I bought the new tip the parts came with not only the tip but all new nozzle, needle, air caps and collar) and Quality in the end result, an absolutely stunning finish. I'll be spraying some paint soon and when I do I'll update the review on that. Mike Update 6/4/2020 Well I promised an update on paint spraying and I have done a few pieces now and I can say I'm very pleased with the results. Getting the paint to a point where you don't have the "Orange Peel" effect takes some trial and error but once you understand it your going to get better at it. My recommendation is to read Arni's review. He is spot on and much more articulate with what he says about this sprayer.
J**.
High Quality HVLP that gives a great finish
This is a high quality system. All of the parts are solid and durable, exactly what you would expect with this level of gun. It allows a wide range of adjustments from spray pattern, air flow, air/product mix, etc that allows you to really dial in the best spray for the particular finish you’re using. I can’t say enough about the quality of the system. The gun works really well. Setup for spraying is straightforward. I achieved awesome results using this gun. I’ll never go back to brushing! One last thing, the instruction manual is really well written. It’s clearly written in English and is written like an experienced painter is standing there explaining how to use it. It also contains a lot of useful links to companies that make associated finishes and products.
C**O
Sprays Like Butter Worth Every Penny
I’ve owned tons of sprayers over the years Titans, Gracos you name it. They’re all reputable companies, but Fuji Spray really impressed me with the quality of their HVLP sprayer. I’ve mainly used mine for lacquer (thinned and catalyzed) as well as alcohol-based primers thinned with denatured alcohol, and this thing sprays like absolute butter. Once you dial in the right setting, the sprayer puts out a perfect fine mist that lays down smooth, even, thin coats every single time. Cleanup is simple, and the gun is built with durable aluminum and steel parts that are easy to take apart and maintain. I already love mine and look forward to using it on many more fine-finish projects. Highly recommend!
R**J
Factory quality finish, but with some challenges
Once you get familiar with the settings, make the proper adjustments, and confirm you have the proper needle / nozzle size for your paint type, the Fuji Spray 2202 produces high quality results. The product documentation that comes with the product is bare bones. But, Fuji Spray's tech support phone line is excellent and highly knowledgeable. A few words of advice: - Make sure you have the right needle/nozzle size for your type of paint (or whatever finish you're working with). The 1.3mm that comes with the sprayer is good for thinner finishes. I had to step up to the 1.8mm for working with latex paint. - While the sprayer can be adjusted to fairly narrow spray, the product produces a lot of overspray that drifts far beyond the immediate spray area. Cover EVERYTHING 360 degrees all around you if you don't want paint to settle on it. - When assembling the sprayer handle for use, insert the needle last and put some light oil on it - Cleaning the sprayer properly takes a fair amount of time and solvent to get entirely clean; poor cleaning will result in poor performance or failure the next time you use it. While using a sprayer speeds up the finishing process and the results are factory quality -- the cleanup process consumes a fair amount of the time saved.
A**I
Well Built HVLP System, Instructions are Lacking
I installed some raised-panel wainscoting in our sun room, and wanted to get a quality HVLP to paint the trim in place. After doing a significant amount of research I figured the Fuji Semi-PRO 2 was the best bang for the buck. I used it to spray Zinsser BIN on all my molding and panels prior to installation, and the Fuji handled the BIN like a champ. But, IMO that's not saying much, since virtually any HVLP can handle BIN just fine. The real test came when I was spraying Benjamin Moore Impervo Satin, which is extremely thick. I've tried in the past using cheaper HVLP systems (Wagner and such) with Impervo, and the finish quality was horrid. So, yesterday I took a shot with the Fuji. I EVENTUALLY was able to get a good finish, but that was after approximately 2 hours of trial and error out in the garage. In fact, I sprayed about 1.5 cans of Impervo on every piece of scrap MDF I could find (and several old doors I had in the shop). After much trial and error, here is my procedure for Impervo: 1. Make sure your Impervo is fully mixed; 2. Strain Impervo using old pantyhose into the Fuji cup; 3. Dilute about 15% with paint thinner; 4. Add the appropriate amount of Penetrol based on Penetrol instructions; 5. Test viscosity with included cup until THE ENTIRE CUP runs out in 25 seconds; 6. Assemble Fuji and turn it on; 7. Open air control valve all the way; 8. Turn paint control knob clockwise until it is completely closed; 9. Turn pattern control knob until it is completely vertical; 10. Turn paint control knob counterclockwise 1 full rotation (you can mark it with a sharpie so you have a reference point); 11. Spray a test piece and you'll probably get a fair amount of overspray (and the edges of the pattern won't be fully atomized); 12. Turn pattern control knob about 45 degrees; 13. Spray a test piece, if you are still unhappy with it turn the pattern control knob fully horizontal' 14. You'll probably have to partially close the air control knob at this point. 15. Test again, you should have a fully atomized (albeit pretty small) pattern. I think having a bigger tip would really help with this application, but I was in a hurry. I checked my results this morning, and the finish was actually very, very nice. No orange peel, and minimal overspray. The hardest thing for me was seeing where I was painting, since the surface was already white with the BIN. One note: the small filter that is on the bottom of the metal supply tube (that goes down in the paint) seemed like it was getting clogged as the paint started drying in the can. I seriously considered just taking it off, but after so much trial and error I was reluctant to change anything. But, if you've strained your paint in pantyhose I can't imagine why you'd need a strainer. The strainer is also very hard to get completely clean, since it is not made of metal. Relatively speaking clean-up is quick with this model. Pour out the paint, fill with some mineral spirits (or whatever is appropriate for your paint), and spray until it runs clear. I did remove the nozzle so I could clean it out properly. Total clean-up time was 5 minutes, tops. Finally, please be aware of the importance of the paint control knob (which you can think of as the trigger adjustment knob located on the back of the gun). I had it wide open for the first hour or trial and error, and didn't realize that my entire problem was I was feeding too much paint. Once you've got the settings right for a product do yourself a favor and write them down. Update 11/11/2014 So I've had this for several months, and have sprayed a ton of water-borne finishes through it (paint, primer, water-borne stains, poly, etc.). I've gotten to where I can set it up, mix the paint (or whatever), paint, and clean-up in about 20 minutes. I painted a bookshelf and kitchen table last weekend in less than 1 hour. This thing really is an excellent value, so I've upped it to 5 stars. Clearly getting some time on it helped quite a bit. IF I HAVE ONE TIP IT IS TO MAKE SURE YOU FULLY CLOSE THE PAINT CONTROL KNOB FULLY BEFORE SPRAYING (when it is close you can't pull the trigger). Then, slowly open it and spray a test piece until you get a nice, wet, smooth finish. I've found I don't need to thin it as much as I used to, and I've found that I typically can get to a perfect patter in less than 1 minute. One other tip: try to avoid oil-based products if you can. The clean-up takes forever, and honestly I am getting such good results with water-borne paints I don't see the need for oil-based.
J**N
What overspray?!?
Impressive and robustly built machine! Ive never sprayed before. After some research, I ended up choosing this semi pro 2 bottom feed HVLP. Then, did more research on needle tips, paints, primers, videos, etc. My first spray project EVER, complete noob! Using a 2mm tip, I painted a big sliding closet door (7 ft height x 4 ft width) To get a feel for the system I used Kilz 2 primer (thinned to 70 sec on Ford cup) and Behr latex paint (also 2mm tip thined to 70 sec) (Research beforehand states that Behr paint is the absolute worst for spraying and Kilz 2 is like molasses, but did it anyway). I removed the air control valve for max air pressure, also removed the filter from the intake tube and it coated primer and paint nicely! 1 coat of primer and 2 coats of latex. Apart from a bit of mist, Very little overspray! Armi's review helped A LOT with narrowing down the setting and saving time with trial/error. ------------------------------------------------------------------------------------------------------------- PROS: *User-friendly and VERY forgiving for beginners, with minimal learning curve. *Clean up time 10 min with 3M system and approx 20 min with vanilla cup. A bit longer when spraying shellac. *Ability to spray unthinned material coupled with the 3M 2.0 system and 1.8mm/2.0mm tip *Durability and customer support *Quick swap with 3M disposable cups for longer spraying sessions (Prefill additional cups, seal with plug, then invert the cup to keep filter wet.) Very convenient feature! *Material use efficiency (Uses less material vs airless systems. Approx 1.25 gallons of SWUETE for 2 coats on 18 cabinet doors. *Included hose is more than adequate, as opposed to some testimonials recommending "whip hose" CONS: *1.3mm needle included is not practical for most users (In hindsight, I should've bought the Hobby Pro 2 which includes a 1.8mm tip) *MUST puchase additional accessories to increase versatility and function - 1.5mm tip/1.8mm tip/2.0mm tip ($58.95 each) - 3M PPS 2.0 pressure cup 13.5oz ($45.99) - 3M PPS 2.0 adapter ($35.16) - 3M PPS refill kit disposable cups ($33.74) ------------------------------------------------------------------------------------------------------------- UPDATE 4/14/25: : Sliding closet doors - Used included bottom feed cup - Impressive result with 2.0 mm tip, with super thick cheap Kilz 2 primer and cheap Behr latex paint (60-70 sec equates to very little to no thinning) UPDATE 10/22/25: New primed MDF cabinet doors. Sanded primer with 400 grit prior to painting with SW Urethane Trim Enamel (Semi Gloss Rosemary) Excellent self levelling. *Note on thinning: Dont bother with percentages, rather go with Ford cup viscosity recommendation. - 3M PPS Series 2.0 Pressure cup - 1.5mm tip @ 28 sec on Ford cup. 4 inch fan and 4 inch stand off. 1st coat: Amazing finish, but time consuming, as this setting only covers 2 inches for each pass at 50% overlap. - 1.8mm tip @ 32 sec on Ford cup (very little thinning) 8 inch fan and 6-7 inch stand off.: 2nd coat (Final coat and NO SANDING BETWEEN COATS): WOW! Very Impressed with its performance! I would rate it at 90% from Pro Grade finish. Total time spent: approx 1 hour for 18 doors for 1 coat each! Im confident this system coupled with the 3M 2.0 pressure cup can spray SWEUTE with NO thinning. Planning on spraying SWEUTE on interior doors without thinning using 1.8mm tip (Will update after) UPDATE 11/25/25: - 2.0mm tip Stix Primer UN-thinned. No problem at all! Coated nicely!
J**C
Awesome sprayer!
Awesome sprayer, used for refinishing cabinets. The finish is awesome, looks like a factory finish. Not going to be able to get that with rollers. It does take some time to figure out how to use. But, once you get it dialed in, no issues. I found it's easy to spray horizontally and not so easy to spray vertically. Happy with the product.
Trustpilot
5 days ago
1 month ago