


Buy anything from 5,000+ international stores. One checkout price. No surprise fees. Join 2M+ shoppers on Desertcart.
Desertcart purchases this item on your behalf and handles shipping, customs, and support to France.
☀️ Retract your worries, extend your outdoor vibe!
The Outsunny 10' x 8' Retractable Awning combines a sturdy aluminum and steel frame with UV and water-resistant polyester fabric, offering adjustable, manual sun protection for decks, balconies, or yards. Designed for versatile mounting on multiple surfaces, it features a smooth manual crank and telescopic arms for customizable shade, making it a stylish and durable outdoor upgrade.


| ASIN | B06XPZC2XW |
| Best Sellers Rank | #35,831 in Patio, Lawn & Garden ( See Top 100 in Patio, Lawn & Garden ) #13 in Patio Awnings |
| Brand | Outsunny |
| Brand Name | Outsunny |
| Color | Beige |
| Customer Reviews | 4.2 out of 5 stars 2,765 Reviews |
| Fabric Type | Polyester |
| Included Components | Hand Crank, Wall Brackets |
| Item Dimensions D x W x H | 96.5"D x 116.25"W x 59.75"H |
| Item Type Name | Sunshade Awning |
| Item Weight | 40.7 Pounds |
| Manufacturer | Outsunny |
| Manufacturer Part Number | 840-150CW |
| Material | Aluminum, Polyester |
| Material Type | Aluminum, Polyester |
| Minimum Clearance | 11.8 Inches |
| Model Number | 840-150CW |
| Operation Mode | Manual |
| Pattern | Solid |
| Product Dimensions | 96.5"D x 116.25"W x 59.75"H |
| Projection Distance | 8 Feet |
| Required Assembly | Yes |
| Size | 10' x 8' |
| Style Name | Modern |
| UPC | 842525106757 |
| Unit Count | 1.0 Count |
M**1
Good product, with a few caveats
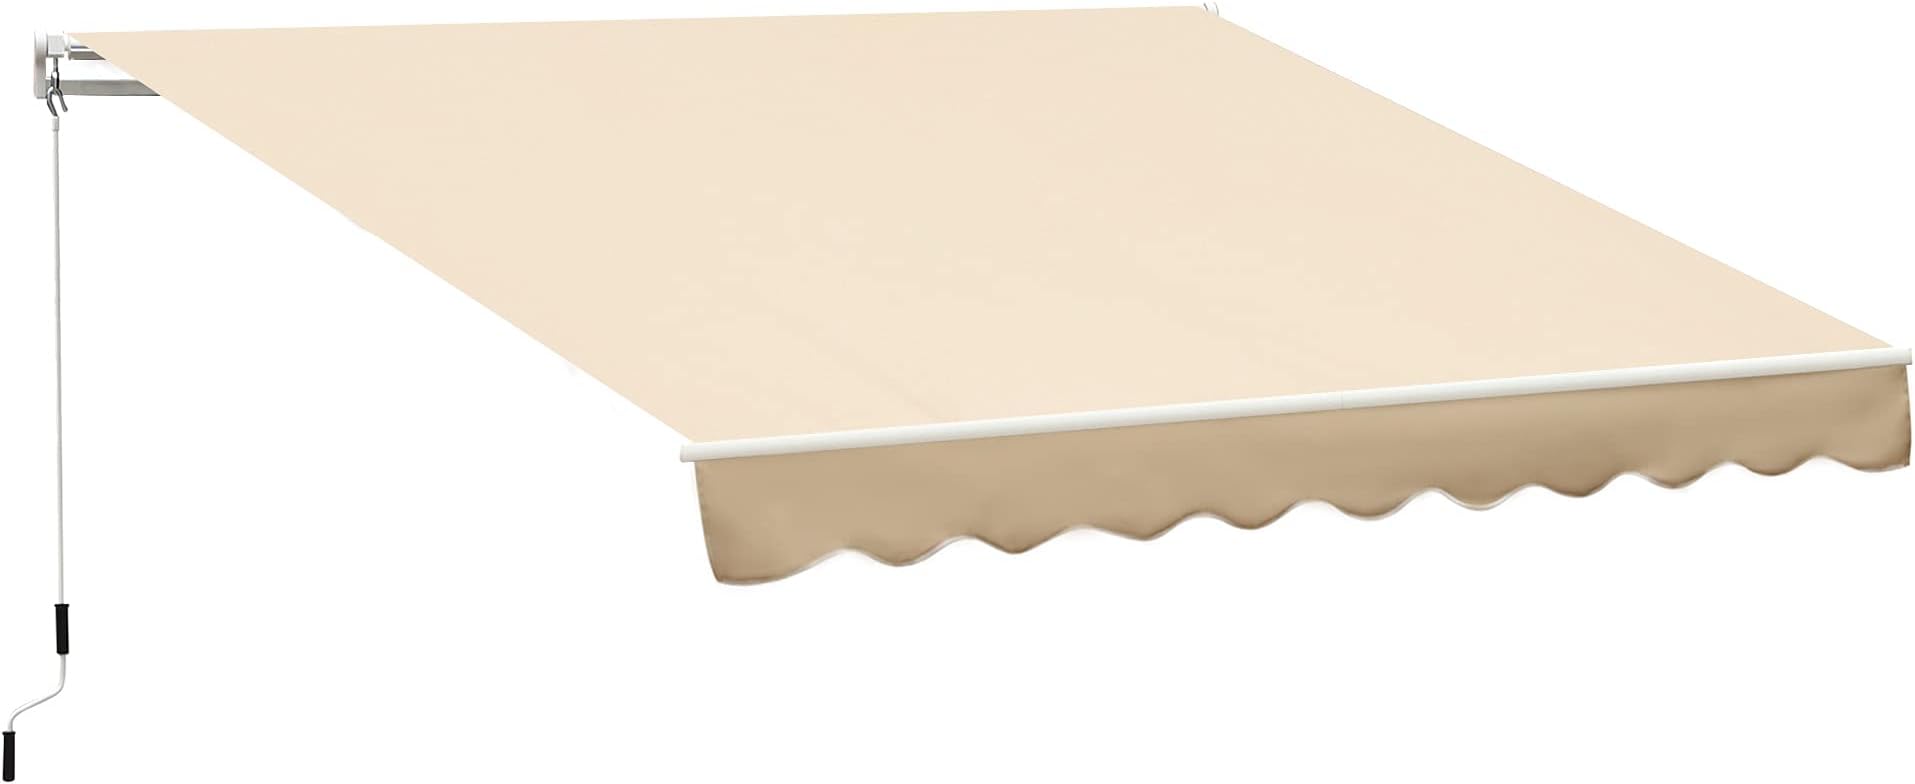
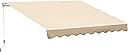
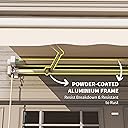
Overall, I am so far satisfied. With the understanding this is a sub $200 retractable awning, you get your money’s worth. The directions are precise and accurate (one exception, more details later in review). No problem following installation directions. Other buyers seem to have struggled with the installation instructions; It’s possible the company has updated the instruction manual since the other reviews were written. Works as advertised. Installation was easier than anticipated, only some minor, self-inflicted glitches. While the sturdiness of the arms seem questionable, I’ve had no issues with operation or any type of failures. I’ve only had it up a few weeks, and have only open and closed it maybe 20-30 times. Can’t attest to durability at this time. As for the instruction manual. As stated, it is precise and accurate. It does explain clearly how to assemble and install. I can understand why some may have trouble with the instructions, as they do lack detailed explanations. Proceed slowly, follow the directions step by step, study the diagrams closely, read ahead and understand what is going to be required and why, and it will make installation go smoothly and trouble free. There are 2 or 3 places where the wording is not clear, but common sense should overcome the few grammatical errors. Some suggestions on the areas which caused me confusion. Direction to roll canvas onto roller. Directions are accurate, but some of the close up images are reversed. Just follow the directions. There is a second picture showing direction of canvas onto roller in the ‘adjusting the awning’ [pitch angle]. If something about the directions don’t make sense, study it until it does. Again, the directions are highly accurate. Only one important step seemed to be missing from the instructions, and that was distance apart to mount brackets. When figuring this out for yourself, measure from center of actual canvas part of the awning, as the awning roller itself is offset onto the awning arms. You only have about an inch to play with when it comes to horizontal positioning of the awning into the right bracket. If you are trying to center the awning over an opening, line up center of canvas over center of the opening (unless you want to offset the canvas). Hint to help make sure roller and canvas is positioned correctly, if you are unsure. Roller has one end with square central nub (goes on left side of awning arms, if facing awning as shown in instructions) and round end (right side). Canvas should roll over the top, or counterclockwise if facing roller from the left (square nub) side. Minor issues. The manual states “Each awning comes with pre-set pitch/angle that is considered ideal”. Don’t believe them. I imagine those who had issues with damage to the extension arms or material roller issues might have not taken into account the awning pitch. Instructions stated make sure arms are installed level on the wall, which mine were. Upon first use, awning was not straight. One side was 2-3 inches lower than the other. I needed to adjust pitch on just one arm to correct this factory error. I had to open and close the awning a few times, loosening and retightening adjusting bolts, to make slight pitch adjustments after each operation, before finding the correct setting. The instructions did not show correct diagram explaining how to adjust pitch, but it is easy to figure out. Slightly loosen the appropriate bolt (the top one of the two) and adjust ‘Jack Bolt’ accordingly. If you can’t visualize how this is done, I’d suggest not playing around unless you understand the simple mechanics of the adjustment process. Adjusting incorrectly could probably cause problems and premature failure of the extension arm. Overall, I am happy with this product and plan on purchasing a second awning to install over my other sliding glass door.
R**Y
Good awning at a good price!
If I were a betting person . . . . I'd say I've looked at more retractable patio awnings that most people could imagine existed! Having NO experience with them, I didn't want to spend a fortune on an awning and find we didn't like it after all. The Outsunny offered the perfect size for our needs, and we thought we'd like the multicolor stripes rather than a dull beige. We are NOT disappointed! Installed, the awning IS the perfect size for our area. Installed, the stripes look AMAZING! And . . . let's face it . . . the price is kinda' unbelievably low! Installation would have been a simple process, had the instructions been clearer. I hope the company will re-think their instruction manual. You are told to assemble the 3 long metal sections, then attach the roller arms to the main body. Much later in the manual, you are instructed to do the very same thing! Should that assembly step be accomplished when first instructed, or when next instructed? Parts and their relationship are very poorly labeled - the illustrations are not nearly as clear as they could/should be. When we were finished with the assembly, prior to putting up the mounting brackets, we had parts left in one of the boxes we had no idea where they went or their purpose. It took a LOT of looking, by 3 guys, before we could figure out where they went and what their purpose was. (And believe me, we 3 guys have assembled a LOT of stuff through the years!) Would I recommend this awning? ABSOLUTELY! Just make sure you have a wanna-be mechanical engineer around who can make sense of a very un-sensical instruction book! (Did I say we LOVE the look of the awning, as well as the ease of operation?) We live in a condo complex where all the decks face into the central grounds. We had just finished installation when neighbors started coming over admiring the awning! We may have several more going up before the summer is over!
E**M
Surprisingly good for price
I received this a few weeks ago and just got around to assembling and install. I am pleasantly surprised by the quality for a $200ish item. We actually bought it thinking if it turned out to be garbage we could return or just use it for a season or two and only be out a couple hundred as opposed to what some of the "higher end" awnings cost. I'll start by saying the instructions inclosed are garbage! Absolutely clear they were written by someone who's second or third language is English. With that being said, if you take your time and just look at the pieces it's pretty obvious how they go together. I'm very mechanically inclined so it took me about an hour or so but I was in no hurry. TIP...don't tighten any of the BOLTS until its hung in place. Tighten all SCREWS completely but not the bolts as there's a good chance you'll have to adjust some pieces once in place. I thought of that during assembly and glad I did. Actually hanging it is a breeze. Assembled the awning isn't very heavy and I was able to hang it and level by myself. Another tip...take your time and measure a twice before drilling holes for the hangar brackets. There is a few inches of "wiggle room" but not a huge amount so you want to be sure your location is correct. I hung mine just below the gutters on the back of my house. The instructions state to give atleast 4 inches clearance if there will be anything above the awning. Thats actually pretty close but I would say to go closer to 4 1/2" - 5". I left myself 5" and it worked perfect. Overall it seems like a good item and I'm actually planning on buying another for the other end of my porch. 4 stars because the instructions are trash. If you're not afraid of that then go for it. Update: Just assembled and hung a second awning. Ordered the wrong color, which my wife is killing me over, but they're close so whatever. Anyway, it's been a year since the first awning we hung and we're happy. Work Everytime and handles the wind ok. If it's windy I wouldn't extend it all the way out, just use common sense. For $150-180 bucks this really a good buy. Just know that the instructions are still garbage and probably written and interpreted in Pakistan so take your time. Each time you add a piece just stop, look at it, and ask if this looks/makes sense.
A**R
Left hand only - and please get a second person for assembly
I am adding a star for great customer service. To be honest the awning is great and what you would expect. Let me get into some reservations about a 5 star review, because I do think it is a good product. I have based this on seeing some other products in the field particularly from higher priced competition and they all seem to have similar problems. So take the rating with that specific idea in mind. First issue - I assumed since they didn't ask and didn't specify that this could be installed with the crank on either side. My installation does not allow a left side crank because it is on a second story and the crank would be out over the empty space. Doable at an angle but not ideal. I will make it work by "re-engineering" the brackets so that I have the crank on the right as I would like, the mechanism is simple enough, but if you aren't comfortable with this type of work, just know that you have to leave the crank on the left side, it is the only option. Perhaps, though, I am an idiot and missed where they would let you specify a right hand crank. edit: I want to update that I have now installed after re-doing a couple of parts to allow a right hand crank and it works great. Just know that this means drilling out a bushing, and also that all the instructions have to be taken slightly inverted (i.e. clockwise turn not CCW as the instructions have you do.) A second thing, the parts are thin aluminum. They gain strength through the cross-section, I'm not saying they are flimsy for the purpose - but they are flimsy for assembly - this is to say, get a second person to help with the assembly as if you whack the parts against anything they will bend, and it's almost impossible to assemble the shade without flailing the parts about, unless you have two people. These bends ultimately won't matter to the performance, but if you are a stickler for cosmetic detail you might get angry fast. Speaking of two people - you 99.9% need two people to hang the awning. You could probably fixture something here or there and make it work with one person (I tried and failed) but just call a buddy it's 100 times easier. The real issue is that the retaining bolts are designed in a way that they apply a little bit of compression on the cross member (not a lot, but a little, hence people talking about needing to widen the holes). But the natural result of this is that to get the retaining bolt in, someone needs to hold the other end on the bracket. That said, price is price, you put up with these things for that. I just wish it was truly easily specified that this was only available as left side crank. Especially when two simple hardware changes would allow for installation on either side. edit: based on a survey of available options, this is commonplace. I find this curious but maybe I should start my own business modifying for right side.
C**Y
Inexpensive and Built to Last
I just finished assembling and installing my newly purchased Outsunny 10x8 Exterior Manual Awning Sun Rain Shade Cover – Beige. As mentioned in other reviews, the directions are less than stellar but they aren’t worthless. Consulting them helps determine the orientation of the pieces. I think it would be difficult to assemble it wrong if you follow the directions. Very important not to cut the plastic straps on the extension arms until the unit is completely installed and locked in place. I installed my awning on my deck on wood siding. I ignored instructions regarding the bracket locations. If you are installing on a wood wall, you MUST locate the brackets on studs or a header. Otherwise things could end badly. Fortunately, the brackets can be mounted anywhere within a couple of feet from the end of the awning. I installed mine 18 inches from the ends. I used the included lag bolts. A metric ratchet set will make installation and final adjustments much easier. I did not have to re-drill any holes as mentioned in other reviews. Everything lined up pretty well. A rubber hammer is also helpful. One more thing…I set up an 8 foot table on the deck for assembly. Beats working off the deck. Called the wife out to lift it onto the brackets (2 step ladders required). We dropped the bolts into place to secure it and then I spent about a ½ hour fiddling with the adjustments to get it level and at the right angle. The price is incredible. I was very close to plunking down $600 at Home Depot when I saw this on Amazon Very happy with the result. Good luck! UPDATE: So here it is 6 years and 3 months later. This awning is still bringing it. The price is now even more unbelievable. It is still waterproof and it rolls in and out fairly easily. The only thing that broke was the plastic sleeve on the crank handle which was repaired with some duct tape. We use this awning all year long.
P**R
Very nice awning, just be sure to ignore the instructions!
After several years of trying to find a replacement in this size I finally lucked out and this size was in stock. Today was a decent New England day and warmer weather's on the way so it was time for assembly. My first impression as a former design technician was that there was some decent thought put into the design of this awning; fit and function are pretty well thought out, with a few opportunities for minor improvement, but nothing prohibitive. For anyone interested in doing this alone as I did, here's how it went: First, do NOT attempt this if you don't have a 15' long area which you can set up to support working on the assembly at a comfortable height. My workshop being 12' by 16' was just workable having the adjacent driveway available as well. More on that later. What you start with is several "halves" that lock together to create the full length frame. Most of this work is straightforward despite the horrid text translations. Any handyman worth their salt will have few issues here. Do yourself a HUGE favor: Once you have assembled the main frame which will be seated against your building, mount the brackets to the building NOW, making sure they are leveled and all 3 are in a straight line. Once fully assembled this thing will weigh a ton and be a beast to control, you'll be very thankful the brackets are where they need to be so you can just hoist this puppy up and into place. The rest of the assembly is pretty much "by the book", with the exception of where they tell you to set one bar "6 cm from the end of the adjacent bar"- this is BULL! DO NOT tighten the "foot brackets" until later when the rolled up fabric is installed. Center the entire roller and then tighten the brackets. Huge mistake on their part. The other main concern is sliding the fabric into the slots that hold it; use caution and be very patient here or you can tear the stitching either at the point of entry or the midpoint where the two halves join. This is also where that extra space in the driveway comes in handy- you'll have 13 feet of frame sitting there and another 13 feet of spline-line fabric you need to feed into a slot without snagging it and causing a tear! I set the roller on a ladder for support and moved both the ladder and roller closer as I worked. (this will make sense when you go to do it) A trustworthy assistant would be invaluable here to prevent an accidental snag, as feeding the fabric into the frame is a bit tedious. I managed alone, but had to be very careful especially at the points there is stitching being fed into the slots. Once fully assembled this thing is big, bulky, and heavy. As one who used to toss my 130 lb Coleman Scanoe over my head and jaunt around the yard like it was a paper bag, trust me- this thing is HUGE and hard to aim into those little tiny brackets that are up over your head and impossible to spot as you shove this monstrosity up there and nearly into place. Get two strong ladders (it's you And the canopy!) and get help. I used to put mine up and take it down myself back when I was young and healthy, and it was a chore back then. Now I'm smart enough to realize one small slip and this thing gets destroyed in an instant! Get help. You'll be glad you did. It only takes a minute to hang, but it feels like an hour!!
J**.
Instructions should be called DESTRUCTIONS
As many others have mentioned, the so-called instructions are totally useless. I oredered two of these (13x8) for use on my lanai. You need construction experience to put them together. HOWEVER, that being said, once up, they do the job and appear to be fairly solidly built, given the price point. Took two of us, with extensive construction/engineering backgrounds, almost three hours to install the first unit and another two for the second. You DEFINITELY need two people to lift it into place! Customer communication is NON-EXISTANT. We were unable to find when/where our order was until the day it arrived which made installation planning difficult. Would I order again...don't know...will have to wait and see how the producrt holds up.
M**T
Great Canopy. Two person installation. Sense of humor mandatory
Really nice canopy. Chose this as neighbor has two. 1) needs TWO people to install. Not just two ladders! 2) be sure you have up to date manual. Go online for latest version! 3) requires some handyman skills and a sense of humor. 4) needs a reasonable amount of fine tuning to get canopy equally aligned to ensure correct opening and closing 5) says does not have lug bolts required for mounting into wood but it does! Mine came with old manual that is missing vital pictures of underneath canopy required for quick understanding of correct placement. NEW manual has really good pictures and better instructions (despite multiple “typos”. I bought the 10’ x8’ canopy and it would benefit from a slightly longer mounting bar to ensure proper placement of canopy as when mounting into wood studs one needs a little give on where mounting bolts are placed. Fabric is of reasonable quality. ALL parts were in pack. Easy assembly of canopy and mounting bars but getting exactly correct placement of canopy supports takes a little patience. Took three hours to install fully but would have taken less than half that if correct ( newer) manual was in pack. Hence some of the negative feedback on previous reviews. Advantage of online manual was being to enlarge relevant VITAL pictures. Worth the effort.
T**Y
Excelente producto.
Excelente tiempo de respuesta, Buena calidad de producto, fácil de ensamblar e instalar, trae todos los accesorios necesarios. Excelente para la aplicación solicitada.
C**.
El uso va a definirá la calidad
El producto es bueno, no envían el seguimiento del artículo desde su salida hasta la entrega, y su español es muy malo.
Trustpilot
3 weeks ago
2 weeks ago